What is your current Project?

Everything to do with model railways.

Re: What is your current Project?

Postby Crumplezone » Thu Jul 31, 2014 9:04 pm

So the weathering powders and stuff turned up just after 5 and I've spent about 2 and half hours working with them and these are the results so far. I wouldn't say there super awesome weather jobs but first time using them and things seem to have paid off ok. Learned a few things to and also noted to myself I'll need some new brushes since the method of powder application is similar to drybrushing which if anyone has used that technique before knows it destroys brushes.

Anyway, enough waffle and more pics and I do apologise about picture quality as there taken off a 1st generation ipad mini so the camera is abit last generation and doesn't pick up detail well in light:

Brake Van:

3861
3862

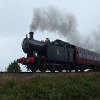
Ivatt 4MT Flying Pig:

3863
3864
3865

On the first set of pics you see the usage of the rust powder, its quite orange and I did try a dabble of iron oxide but found it really red. Being that the Brake van was the test bed its not particularly good imo but it will serve its purpose and now looks less plastic.

On the Ivatt I applied the rust powder onto the left side of the tender and found it to well look really quite bad and put me off using the rust on the loco and opting for a more dirty finish. By trial and error I found that dark earth powder suited the locomotive alot better and also after finding a games workshop basecoat brush I had bought years ago it started to apply alot better so I will have to go shop for some high quality but soft brushes for powder application so they kinda smudge and go dust like on the locos and other rolling stock. You will note I've apparently not touched the wheels, unfortunately due to me handling the loco by the wheels most of the weathering I applied came off and the rest was removed with thinners to bring the connectivity on the rails back up.

Also what surprised me is how much the matt varnish can change the weathering powders colour, they can be quite abit different from powder to matt varnished and I'm glad I used dark earth on the loco than the rust colours. I may use Rust when I get around to the Q1 as I feel that loco deserves quite abit of a rust look to the loco.

I have learned a fair bit with today session, namely the powders can be quite different looking from pot to loco and the varnish can change the colour of the powders, I need to also get a few new brushes which will suit smudging the powders to create the dusted on effect and also probably a good idea to sort a better way to apply varnish to the locos from a distance which a suitable item could be a airbrush turntable which I can put the locos on a piece of track I'm not using and just 360 it.

I think I will have to find some plastic out of the old warhammer 40k box and use that as a testbed for layering to see how well powder -> varnish rinse and repeat works to achieve the super rusted looks some people achieve. Though I can see that to some certain extends weathering locos is probably alot easier with a spraygun so I may consider that at some future point to. I'm also going to have to get some liquid glaze as 3 windows popped out while weathering and I've misplaced them.

Either way today has been quite fun and it shows I'm not totally crap at painting skills after all these years, unfortunately the RSI is twitching abit so maybe a few days more before I get around to something else.

Hope you like my first attempts :lol:
User avatar
Crumplezone
Full Time Fireman
 
Posts: 85
Images: 60
Joined: Wed Apr 09, 2014 11:52 pm
Has thanked: 31 times
Been thanked: 50 times

Re: What is your current Project?

Postby VictoryWorks » Thu Jul 31, 2014 10:22 pm

Nicely done, lots of interesting info and for a first day I'd say you've done very well mate.
Hope the RSI calms down.
User avatar
VictoryWorks
Driver
 
Posts: 333
Joined: Mon Apr 07, 2014 1:22 pm
Has thanked: 41 times
Been thanked: 224 times

Re: What is your current Project?

Postby Crumplezone » Thu Jul 31, 2014 10:36 pm

VictoryWorks wrote:Nicely done, lots of interesting info and for a first day I'd say you've done very well mate.
Hope the RSI calms down.


Thanks Pete :D

I still think the roof and stuff stick out abit in the shots, unfortunately soot/smoke weathering powder on black doesn't work so well and you kinda get those shiny locations. I will probably try to ink wash the buffer beams with some black ink mixed with abit of black weathering powder, let it dry off and then use abit of thinner and rub out little parts of to show the cleaners had followed safety regs.

The Ivatt's coal mass is temp for the time being to untill I can grab a bag of woodland scenics lump coal and then create a more realistic heaped tender. I also may touch up the tender at the back near the water cap to give it a more rusted look, I'm not to fond on limescale lines(I did do it on the boiler but I'm not to convinced on it) so probably won't put any down the side of the tender.

When I go back to weathering in a few days I may do another layer of dark earth across boiler sections top and maybe try to do a better soot line. I think my brushes maybe the issue at the moment so I'll have a look for some different ones.

On another note, Pete do you have any colour pictures of a Q1 in worn down livery or just rusted looking in pictures for reference? I plan to do th Q1 as the next weathered loco and I'm thinking about aiming for heavier weathering that the Ivatt for it though I am going to see if the layering of powder + varnish allows for a heavy weathered look.
User avatar
Crumplezone
Full Time Fireman
 
Posts: 85
Images: 60
Joined: Wed Apr 09, 2014 11:52 pm
Has thanked: 31 times
Been thanked: 50 times

Re: What is your current Project?

Postby VictoryWorks » Thu Jul 31, 2014 11:40 pm

Most of my historic Q1 pics are black and white but I'm sure I have a couple that might help. If you PM me your email I'll sort out getting them to you.
User avatar
VictoryWorks
Driver
 
Posts: 333
Joined: Mon Apr 07, 2014 1:22 pm
Has thanked: 41 times
Been thanked: 224 times

Re: What is your current Project?

Postby cjbarnes5294 » Sun Aug 03, 2014 11:32 pm

Great work on the weathering, Daniel. It takes alot of bravery to try weathering expensive models, especially if it's an unfamiliar art. Generally, I'm a firm believer in clean locos, but I'd be interested in having a go at weathering on an old wagon or shot model kit. :) That said, no real loco is completely clean unless it's sitting under cover in a museum, so it might be worth investigating applying subtle smut along the boiler, cab, running plate and grime on the wheels, motion and frames etc. One to add to my to-do list I think.

Chris
The Red Queen Hypothesis, applicable to train sim development?

"Here, you see, it takes all of the running you can do, to keep the same place."
cjbarnes5294
Driver
 
Posts: 398
Images: 82
Joined: Mon Mar 31, 2014 12:40 pm
Location: Gloucestershire/North Yorkshire
Has thanked: 551 times
Been thanked: 187 times

Re: What is your current Project?

Postby Crumplezone » Mon Aug 04, 2014 2:56 am

cjbarnes5294 wrote:Great work on the weathering, Daniel. It takes alot of bravery to try weathering expensive models, especially if it's an unfamiliar art. Generally, I'm a firm believer in clean locos, but I'd be interested in having a go at weathering on an old wagon or shot model kit. :) That said, no real loco is completely clean unless it's sitting under cover in a museum, so it might be worth investigating applying subtle smut along the boiler, cab, running plate and grime on the wheels, motion and frames etc. One to add to my to-do list I think.

Chris


Thanks Chris. I must admit I felt quite reluctant at first when I finished up the brake van at first. First thing came to my mind is "does this actually look good?" then I kinda just went Y.O.L.O and pulled the Ivatt out of the box and started on it. Thankfully I started with the tender first and saw how the rust weathering powder effected the locos and then ended up changing to the dark earth which gave it the more muddy and grime looking look to the loco.

Thanks also to Pete with him providing a set of 6 colour photos to use as reference I have a general idea of what I might want to attempt on the Q1, its quite interesting as the Q1s seem to more grey dirt covered rather than the muddy grime dirt other locos would receive. Also to note was Pete's information about the Q1s suspectable nature to priming so I hope to achieve that ash dirty water effect on the smokebox of the Q1. I still may opt for the muddy effect which the Ivatt has on the Q1 but we'll see once I get around to it. I think the smokebox will be the first part I will try to tackle on the Q1 and then work from there onward to achieve the look I want to get from it. What is quite interesting is where the rust areas appear, e.g. lower part of the firebox, lower edges of smokebox, front end of the loco above the buffer where I believe the cylinders sit are coated in a layer of rust. Yet the wheels on the Q1 only really show tire rust and not as much noticable rust on the outside.

I don't know if this is attributed to the design of the Q1s more open frame appearance but it was quite interesting to see and is quite a eye opener in one respect. To add to this I've been able to order some Humbrol Stipple and Coloro brush packs, they are both designed more towards weathering and while some may say its not worth splashing the cash I thought it might be worth getting some quality brushes and see how to react with the powder and application of the powders.

On another note, I finished two backbreaking days of baseboard construction, now I didn't expect to baseboard frame to become so heavy once plywood was put ontop but by god it must have been nearlt 40kilos by the time I was finished. The frame is 6x4 foot and is in 1inch by 4inch deep timber and while the wood seemed quite light at the wood merchants by the time the actual frame was done before plywood fixing it started to dawn on me it would actually turn out to be far heavier than expected. So plans to balance all that weight on ikea metal legs has gone out the window and I'm now going to have to go grab another 6ft 1"x4" beam to affix to my bedroom wall which will then have temp hinges/fixtures to keep the board in place on that one side and then probably 2x 4"x4" x height needed legs equivilent to probably the same thickness as piano legs with adjustable metal feet to equate for height differences in the floor.

Also can I just say, 6ft is alot bloody bigger in person than it seems when your planning it on paper and even after measuring it up to make sure it fits. Either way, it wasn't fun taking 40 odd kilos of weight on your arms up a stairs which has a somewhat akward angle to get it vertical on the 6ft at the top of the landing....lesson learned, don't build it downstairs.

I can't say its the first time I've not felt regret at the size of 00 layouts :lol:

Also...first time doing a big DIY project without Dad helping out, its amazing how much less swearing and arguements there was putting it together :lol: :D

Anyway I hopefully with be able to show the Q1 by end of week or towards weekend, its mostly going to be down to delivery of the brushes and time permitting as I've suddenly been thrown aload things to do with family which is all YAY in my book :x :P :lol:
User avatar
Crumplezone
Full Time Fireman
 
Posts: 85
Images: 60
Joined: Wed Apr 09, 2014 11:52 pm
Has thanked: 31 times
Been thanked: 50 times

Re: What is your current Project?

Postby VictoryWorks » Mon Aug 04, 2014 10:41 am

A little tidbit on the Q1 is that the centre driving wheel on the left side was often covered in oil streaks. This was due to the steam reverser cylinder above it that would leak constantly.
My only thought on the grey dirt is that Q1's ran a lot of stone trains (1000+ tons, pretty scary with their tendency to hunt - sway from side to side at speed - and their poor brakes) which might be the source.
Looking forward to seeing your one :)
User avatar
VictoryWorks
Driver
 
Posts: 333
Joined: Mon Apr 07, 2014 1:22 pm
Has thanked: 41 times
Been thanked: 224 times

Re: What is your current Project?

Postby Crumplezone » Mon Aug 04, 2014 12:34 pm

VictoryWorks wrote:A little tidbit on the Q1 is that the centre driving wheel on the left side was often covered in oil streaks. This was due to the steam reverser cylinder above it that would leak constantly.
My only thought on the grey dirt is that Q1's ran a lot of stone trains (1000+ tons, pretty scary with their tendency to hunt - sway from side to side at speed - and their poor brakes) which might be the source.
Looking forward to seeing your one :)


Sounds logical then that they would be dusty stone colour rather than muddy looking or grime looking like locos from other regions looked. What I did find alittle amusing is on the pics you provided most of the loco is dirty but hte cab sides are nearly pristine in appearance. I can't help feeling that the Q1 drivers were abit eccentric and demanded the cab be spotless but leave the rest dirty :lol: :)

1000ton stone trains with hunting? good god that must have been a scary prospect to drive especially with the Q1 being light on its feet and poor braking. Also 1000tons of stone...isn't that 9F pulling power capacity? I knew the Q1s were the most powerful 0-6-0s ever built for our country but a 0-6-0 with the power of a 9F is just a tad bit scary when you come think about it, it also brokers the question why the Q1s design wasn't further enchanced with better braking and a fix to its hunting to allow it to become even better than it actually was.

Have to say Pete its been quite interesting hearing about the Q1, you must have had quite abit of fun listening to the Q1 driver you spoke to for your Q1 addon. Its the one thing which I think we all missed when we compared to modern day steam as were unlikely to see A4 pacifics pulling 14 coaches or some of the freight locos slogging up a line with 40+ 10ton wagons in tow. One can understand why we obviously don't see things like that but it must have been magical seeing steam railways in the 40s and 50s when they were still pretty dominant as the main form of transport.
User avatar
Crumplezone
Full Time Fireman
 
Posts: 85
Images: 60
Joined: Wed Apr 09, 2014 11:52 pm
Has thanked: 31 times
Been thanked: 50 times

Re: What is your current Project?

Postby cjbarnes5294 » Mon Aug 04, 2014 1:26 pm

Crumplezone wrote:Sounds logical then that they would be dusty stone colour rather than muddy looking or grime looking like locos from other regions looked. What I did find alittle amusing is on the pics you provided most of the loco is dirty but hte cab sides are nearly pristine in appearance. I can't help feeling that the Q1 drivers were abit eccentric and demanded the cab be spotless but leave the rest dirty :lol: :)


Image

Ooh I see what you mean. Considering my personal experience as a cleaner, I would guess that only the cabsides were kept clean because you can reach out of the windows and wipe along the sides and bottom from the steps and ground respectively. Without a handy running plate to walk along, you'd need to lean a ladder on the side of the boiler, as you do with tenders - it takes longer to clean. I suspect that sheds in BR days didn't care as much about the overall appearance as us preservationists. :D But I also imagine that the cab interiors were kept reasonably clean, if worn, throughout their working lives, for hygiene reasons: it's important to keep dust and unnecessarily oily surfaces down to a minimum, especially where you're putting your hands.

Looking forward to seeing the Q1 dirtied up. :P

Chris
The Red Queen Hypothesis, applicable to train sim development?

"Here, you see, it takes all of the running you can do, to keep the same place."
cjbarnes5294
Driver
 
Posts: 398
Images: 82
Joined: Mon Mar 31, 2014 12:40 pm
Location: Gloucestershire/North Yorkshire
Has thanked: 551 times
Been thanked: 187 times

Re: What is your current Project?

Postby Crumplezone » Mon Aug 11, 2014 8:37 pm

So after abit of consideration while being dog rough with my own health at the moment I've been fiddling with Scarm to design a different track plan. After putting the frame together for the baseboard and realising just how big it is, its becoming a realisation that the frame is unwielding and annoying to move about due to weight and size even though the original plan covered a loop and what not.

Suppose one could consider it bad planning but it had measured up fine, just the wood turned out to be fair heavier than listed in how-to books, but thats hindsight for you.

So, something like this might happen instead:

Image

Its still 6ft long but now only 2ft wide and the track extends left into a transition tunnel which would then potentially go onto a 4ft by 2ft section which could be either branchline/mine/double track mainline. What the above becomes is basically a busy engine shed with station with run around for a tender loco to pull forward, reverse to where the siding with signal box is and wait while a engine comes off shed to take the consist away from next service.

I may take this option, but I'll have to see, its a option anyway and 6ft long by 2ft is alot less heavier than a 6x4 frame.
User avatar
Crumplezone
Full Time Fireman
 
Posts: 85
Images: 60
Joined: Wed Apr 09, 2014 11:52 pm
Has thanked: 31 times
Been thanked: 50 times

PreviousNext

Return to Model Railways

Who is online

Users browsing this forum: No registered users and 1 guest

cron